Bharat Banate's Work Profile

View Bharat Banate's profile on LinkedIn
Showing posts with label Linux. Show all posts

Tuesday, August 26, 2008

Who Writes Linux and Who Supports It

• Who is Writing Linux?

* Every Linux kernel is being developed by nearly 1,000 developers working for more than 100 different corporations. This is the foundation for the largest distributed software development project in the world.
* Since 2005, the number of active kernel developers has tripled, reflecting the growing importance of Linux in the embedded systems, server, and desktop markets.
* Between 70 and 95 percent of those developers are being paid for their work, dispelling the “hobbyist” myth present from the start of open source development.

• Who is Sponsoring Linux?

More than 70 percent of total contributions to the kernel come from developers working at a range of companies including IBM, Intel, The Linux Foundation, MIPS Technology, MontaVista, Movial, NetApp, Novell and Red Hat. These companies, and many others, find that by improving the kernel they have a competitive edge in their markets.

• How Fast is Linux Developed and Released?

* An average of 3,621 lines of code are added to the kernel tree every day, and a new kernel is released approximately every 2.7 months.
* The kernel, since 2005, has been growing at a steady state of 10 percent per year.

Thursday, August 7, 2008

RAID Level in Details

What is RAID?

RAID allows information to access several disks. RAID uses techniques such as disk striping (RAID Level 0), disk mirroring (RAID Level 1), and disk striping with parity (RAID Level 5) to achieve redundancy, lower latency, increased bandwidth, and maximized ability to recover from hard disk crashes.

RAID consistently distributes data across each drive in the array. RAID then breaks down the data into consistently-sized chunks (commonly 32K or 64k, although other values are acceptable). Each chunk is then written to a hard drive in the RAID array according to the RAID level employed. When the data is read, the process is reversed, giving the illusion that the multiple drives in the array are actually one large drive.

Hardware RAID

The hardware-based array manages the RAID subsystem independently from the host. It presents a single disk per RAID array to the host.

A Hardware RAID device connects to the SCSI controller and presents the RAID arrays as a single SCSI drive. An external RAID system moves all RAID handling "intelligence" into a controller located in the external disk subsystem. The whole subsystem is connected to the host via a normal SCSI controller and appears to the host as a single disk.

RAID controller cards function like a SCSI controller to the operating system, and handle all the actual drive communications. The user plugs the drives into the RAID controller (just like a normal SCSI controller) and then adds them to the RAID controllers configuration, and the operating system won't know the difference.

Software RAID

Software RAID implements the various RAID levels in the kernel disk (block device) code. It offers the cheapest possible solution, as expensive disk controller cards or hot-swap chassis [1] are not required. Software RAID also works with cheaper IDE disks as well as SCSI disks. With today's faster CPUs, Software RAID outperforms Hardware RAID.

The Linux kernel contains an MD driver that allows the RAID solution to be completely hardware independent. The performance of a software-based array depends on the server CPU performance and load.

To learn more about Software RAID, here are the key features:

*

Threaded rebuild process
*

Kernel-based configuration
*

Portability of arrays between Linux machines without reconstruction
*

Backgrounded array reconstruction using idle system resources
*

Hot-swappable drive support
*

Automatic CPU detection to take advantage of certain CPU optimizations


RAID Levels and Linear Support


RAID supports various configurations, including levels 0, 1, 4, 5, and linear. These RAID types are defined as follows:

*

Level 0 — RAID level 0, often called "striping," is a performance-oriented striped data mapping technique. This means the data being written to the array is broken down into strips and written across the member disks of the array, allowing high I/O performance at low inherent cost but provides no redundancy. The storage capacity of a level 0 array is equal to the total capacity of the member disks in a Hardware RAID or the total capacity of member partitions in a Software RAID.
*

Level 1 — RAID level 1, or "mirroring," has been used longer than any other form of RAID. Level 1 provides redundancy by writing identical data to each member disk of the array, leaving a "mirrored" copy on each disk. Mirroring remains popular due to its simplicity and high level of data availability. Level 1 operates with two or more disks that may use parallel access for high data-transfer rates when reading but more commonly operate independently to provide high I/O transaction rates. Level 1 provides very good data reliability and improves performance for read-intensive applications but at a relatively high cost. [2] The storage capacity of the level 1 array is equal to the capacity of one of the mirrored hard disks in a Hardware RAID or one of the mirrored partitions in a Software RAID.
*

Level 4 — Level 4 uses parity [3] concentrated on a single disk drive to protect data. It is better suited to transaction I/O rather than large file transfers. Because the dedicated parity disk represents an inherent bottleneck, level 4 is seldom used without accompanying technologies such as write-back caching. Although RAID level 4 is an option in some RAID partitioning schemes, it is not an option allowed in Red Hat Enterprise Linux RAID installations. [4] The storage capacity of Hardware RAID level 4 is equal to the capacity of member disks, minus the capacity of one member disk. The storage capacity of Software RAID level 4 is equal to the capacity of the member partitions, minus the size of one of the partitions if they are of equal size.
*

Level 5 — This is the most common type of RAID. By distributing parity across some or all of an array's member disk drives, RAID level 5 eliminates the write bottleneck inherent in level 4. The only performance bottleneck is the parity calculation process. With modern CPUs and Software RAID, that usually is not a very big problem. As with level 4, the result is asymmetrical performance, with reads substantially outperforming writes. Level 5 is often used with write-back caching to reduce the asymmetry. The storage capacity of Hardware RAID level 5 is equal to the capacity of member disks, minus the capacity of one member disk. The storage capacity of Software RAID level 5 is equal to the capacity of the member partitions, minus the size of one of the partitions if they are of equal size.
*

Linear RAID — Linear RAID is a simple grouping of drives to create a larger virtual drive. In linear RAID, the chunks are allocated sequentially from one member drive, going to the next drive only when the first is completely filled. This grouping provides no performance benefit, as it is unlikely that any I/O operations will be split between member drives. Linear RAID also offers no redundancy and, in fact, decreases reliability — if any one member drive fails, the entire array cannot be used. The capacity is the total of all member disks.

Tuesday, August 5, 2008

Linux File System Structure.

Overview of File System Hierarchy Standard (FHS)

Red Hat Enterprise Linux uses the Filesystem Hierarchy Standard (FHS) file system structure, which defines the names, locations, and permissions for many file types and directories.

The FHS document is the authoritative reference to any FHS-compliant file system, but the standard leaves many areas undefined or extensible. This section is an overview of the standard and a description of the parts of the file system not covered by the standard.

Compliance with the standard means many things, but the two most important are compatibility with other compliant systems and the ability to mount a /usr/ partition as read-only. This second point is important because the directory contains common executables and should not be changed by users. Also, since the /usr/ directory is mounted as read-only, it can be mounted from the CD-ROM or from another machine via a read-only NFS mount.

FHS Organization

1) The /boot/ Directory

The /boot/ directory contains static files required to boot the system, such as the Linux kernel. These files are essential for the system to boot properly.

2)The /dev/ Directory

The /dev/ directory contains device nodes that either represent devices that are attached to the system or virtual devices that are provided by the kernel. These device nodes are essential for the system to function properly. The udev demon takes care of creating and removing all these device nodes in /dev/.

Devices in the /dev directory and subdirectories are either character (providing only a serial stream of input/output) or block (accessible randomly). Character devices include mouse, keyboard, modem while block devices include hard disk, floppy drive etc. If you have GNOME or KDE installed in your system, devices such as external drives or cds are automatically detected when connected (e.g via usb) or inserted (e.g via CD or DVD drive) and a popup window displaying the contents is automatically displayed. Files in the /dev directory are essential for the system to function properly. Examples of common files in the /dev include:

/dev/hda - the master device on primary IDE channel.
/dev/hdb - the slave device on primary IDE channel.
/dev/tty0 - first virtual console.
/dev/tty1 - second virtual console.
/dev/sda - first device on primary SCSI or SATA channel.
/dev/lp0 - first parallel port.

3)The /etc/ Directory

The /etc/ directory is reserved for configuration files that are local to the machine. No binaries are to be placed in /etc/. Any binaries that were once located in /etc/ should be placed into /sbin/ or /bin/.

Examples of directories in /etc are the X11/ and skel/:


/etc
|- X11/
|- skel/

The /etc/X11/ directory is for X Window System configuration files, such as xorg.conf. The /etc/skel/ directory is for "skeleton" user files, which are used to populate a home directory when a user is first created. Applications also store their configuration files in this directory and may reference them when they are executed.

4) The /lib/ Directory

The /lib/ directory should contain only those libraries needed to execute the binaries in /bin/ and /sbin/. These shared library images are particularly important for booting the system and executing commands within the root file system.

5)The /media/ Directory

The /media/ directory contains subdirectories used as mount points for removeable media such as usb storage media, DVDs, CD-ROMs, and Zip disks.

6)The /mnt/ Directory

The /mnt/ directory is reserved for temporarily mounted file systems, such as NFS file system mounts. For all removeable media, please use the /media/ directory. Automatically detected removeable media will be mounted in the /media directory.

7)The /opt/ Directory

The /opt/ directory provides storage for most application software packages.

A package placing files in the /opt/ directory creates a directory bearing the same name as the package. This directory, in turn, holds files that otherwise would be scattered throughout the file system, giving the system administrator an easy way to determine the role of each file within a particular package.

For example, if sample is the name of a particular software package located within the /opt/ directory, then all of its files are placed in directories inside the /opt/sample/ directory, such as /opt/sample/bin/ for binaries and /opt/sample/man/ for manual pages.

Packages that encompass many different sub-packages, data files, extra fonts, clipart etc are also located in the /opt/ directory, giving that large package a way to organize itself. In this way, our sample package may have different tools that each go in their own sub-directories, such as /opt/sample/tool1/ and /opt/sample/tool2/, each of which can have their own bin/, man/, and other similar directories.

8)The /proc/ Directory

The /proc/ directory contains special files that either extract information from or send information to the kernel. Examples include system memory, cpu information, hardware configuration etc.

Due to the great variety of data available within /proc/ and the many ways this directory can be used to communicate with the kernel, an entire chapter has been devoted to the subject. For more information, refer to Chapter 3, The proc File System.

9)The /sbin/ Directory

The /sbin/ directory stores executables used by the root user. The executables in /sbin/ are used at boot time, for system administration and to perform system recovery operations. Of this directory, the FHS says:

/sbin contains binaries essential for booting, restoring, recovering, and/or repairing the system in addition to the binaries in /bin. Programs executed after /usr/ is known to be mounted (when there are no problems) are generally placed into /usr/sbin. Locally-installed system administration programs should be placed into /usr/local/sbin.

At a minimum, the following programs should be in /sbin/:


arp, clock,
halt, init,
fsck.*, grub,
ifconfig, mingetty,
mkfs.*, mkswap,
reboot, route,
shutdown, swapoff,
swapon

Network Monitoring-Nagios

What Is This?

Nagios® is a system and network monitoring application. It watches hosts and services that you specify,
alerting you when things go bad and when they get better.
Nagios was originally designed to run under Linux, although it should work under most other unices as
well.

Some of the many features of Nagios include:


Monitoring of network services (SMTP, POP3, HTTP, NNTP, PING, etc.)
Monitoring of host resources (processor load, disk usage, etc.)
Simple plugin design that allows users to easily develop their own service checks
Parallelized service checks
Ability to define network host hierarchy using "parent" hosts, allowing detection of and distinction
between hosts that are down and those that are unreachable
Contact notifications when service or host problems occur and get resolved (via email, pager, or
user-defined method)
Ability to define event handlers to be run during service or host events for proactive problem
resolution
Automatic log file rotation
Support for implementing redundant monitoring hosts
Optional web interface for viewing current network status, notification and problem history, log
file, etc.

Saturday, July 26, 2008

What is Raid Level and LVM in Linux...

What is RAID and LVM

RAID is usually defined as Redundant Array of Inexpensive disks. It is normally used to spread data among several physical hard drives with enough redundancy that should any drive fail the data will still be intact. Once created a RAID array appears to be one device which can be used pretty much like a regular partition. There are several kinds of RAID but I will only refer to the two most common here.

The first is RAID-1 which is also known as mirroring. With RAID-1 it's basically done with two essentially identical drives, each with a complete set of data. The second, the one I will mostly refer to in this guide is RAID-5 which is set up using three or more drives with the data spread in a way that any one drive failing will not result in data loss. The Red Hat website has a great overview of the RAID Levels.

There is one limitation with Linux Software RAID that a /boot partition can only reside on a RAID-1 array.

Linux supports both several hardware RAID devices but also software RAID which allows you to use any IDE or SCSI drives as the physical devices. In all cases I'll refer to software RAID.

LVM stands for Logical Volume Manager and is a way of grouping drives and/or partition in a way where instead of dealing with hard and fast physical partitions the data is managed in a virtual basis where the virtual partitions can be resized. The Red Hat website has a great overview of the Logical Volume Manager.

There is one limitation that a LVM cannot be used for the /boot.

Tuesday, March 25, 2008

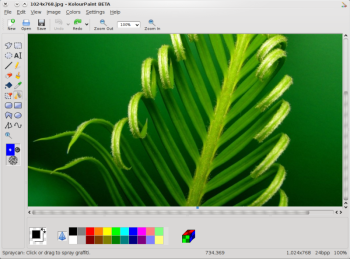
KolourPaint: More than a Microsoft Paint clone


Just as Microsoft Paint is included with every Windows installation, so KolourPaint has been part of the kdegraphics package since KDE 3.3. This simple raster graphics editor works well not only in KDE, but also in Xfce, GNOME, and Fluxbox.

Although it started out as a clone of Microsoft Paint, KolourPaint has grown to include more features than its proprietary inspiration. KolourPaint provides tools for image manipulation and icon editing as well as the typical "fingerpainting" that Paint is well known for. KolourPaint's and Paint's interfaces are nearly identical, but hidden behind a simple interface are several advanced features that make it a great graphics editor.

With the release of KDE 4, KolourPaint 4.0 brings some new features to the table, such as a configurable palette, some heavily refactored code, and new image effects that make photo editing a breeze.

Comparisons to Paint
KolourPaint has all the tools that Paint provides, such as the Brush, Color Eraser, Color Picker, Connected Lines/Polyline, Pen, Polygon, Rectangle, and Text to name a few. It also incorporates single-key shortcuts for all its tools to allow for better productivity. One of the handiest improvements over Paint is the number of levels of undo and redo, which, depending on memory usage, may be anywhere from 10 to 500 levels of history. Selections are also fully undo- and redo-able. KolourPaint includes support for freehand resizing and arbitrary rotation angles, and provides a choice between opaque and transparent selections.

[Click to enlarge] Click to enlargeClick to enlarge KolourPaint's Zoomed Thumbnail mode is an excellent addition to the Paint-like genre. It displays a thumbnail version of an image that works similar to an additional view in the GIMP. You can draw on the thumbnail, erase upon it, and use any selection tool on it. The selection tool needs a little more work in the thumbnail ability, as you can't see what contents you are selecting until you let go of the mouse button. You can resize the Zoomed Thumbnail by resizing its window.

KolourPaint provides Color Similarity, which allows you to fill regions in dithered images and photos. In addition to the standard Paint colors, KolourPaint lets you use other color sets (such as the Oxygen Icons in the latest version), or to create your own.

Unlike Paint, KolourPaint can save in every file format that KImageIO can provide; PNG, ICO, and PCX are supported, with the ability preview the images before you load them.

One of the biggest differences between KolourPaint and Paint is the support for transparency. Every KolourPaint tools lets you draw transparent icons and logos on a checkerboard background. This ability helps KolourPaint act as an icon editor too. By filling the workspace with the transparent "color" and resizing the image to a common icon size, you can whip up some catchy icons in a matter of minutes.

Photo editing

KolourPaint is also a useful photo editing application. Like the GIMP, it allows you to autocrop (remove internal borders) and adjust brightness, contrast, and gamma. Operations you can perform include clear, flatten, emboss, flip, and invert with the choice of channels. You can also resize and rotate, reduce colors, reduce images to greyscale, and smooth scale, soften, and sharpen images.

Effects allow you to change the appearance of the image, such as making an image look like it was painted on canvas. You can access effects that appear under the Image menu from the dialog window, as well as those that don't. The Balance effect, which changes the brightness, contrast, and the gamma of an image, is curiously placed in a new dialog window under Image -> More Effects, rather than as an entry in the Image menu. Almost all effects have an easy slider bar that let you change their values, and a thumbnail of the image that automatically updates when you apply an effect.

Anyone looking to fine-tune their graphic skills, or who would like to become more comfortable with KolourPaint, can peruse the KolourPaint Manual. To obtain further support, users can join the KolourPaint Support mailing list.

KolourPaint lacks a few of Paint's features. Some features currently under development include paletted image editing, selectable text, screen depth independence, and image acquisition from a scanner or a camera.

Still, with many of the features that the GIMP contains, and all but a few of Microsoft Paint's features, KolourPaint provides a simple user interface to manipulate photos and create raster graphics. By blending a completed user interface, stable image effects, and innovative features, KolourPaint's developers have put it one step ahead of other Linux Paint clones. As a graphics application, KolourPaint is powerful enough to make even the GIMP respect it.

Monday, March 24, 2008

Crontab : Scheduling Tasks

Crontab permits to schedule tasks on your computer. For example you can program a safeguard every month on the 13th, or administrative tasks such as booting tasks (checking emails, log off network stations , etc...).
Keywords: @annually , @daily , @hourly , @midnight , @monthly , @reboot , @weekly , @yearly , command , cron.allow , cron.deny , crontab , Scheduling tasks , user .

We first notice that crontab stands out the at utility. Indeed crontab permits to schedule tasks, that is to say repetitive tasks, whereas at only executes one task.

Allow a user to use crontab


My username is nadir. First you have to allow nadir to use the crontab command. We log in as root and we check if the /etc/cron.allow file exists. If it exists, add the user nadir in the file, if it does not exist create it and add the user nadir.
root@ipower:~# nano -w /etc/cron.allow

or write (vi,gedit, nedit, kwrite, etc...) and fill out the file accordingly.

From now on, the nadir user is allowed to use crontab. So it is possible to specify who are the (users) allowed to use crontab and those who are not allowed. To do that, we use the /etc/cron.allow and /etc/cron.deny files.

If the /etc/cron.allow file exists, only the users mentioned will have the right to use the cron command.

If the /etc/cron.allow file does not exist, it is the /etc/cron.deny file which is taken into account: the mentioned users will not have the right to use the cron command.

If neither of the two files exists, only the super user (root) will have the right to use the cron command.

Note: an empty /etc/cron.deny file means that all the users can use the cron commande.

Use of crontab


Once the nadir user is allowed, this one is able to use crontab. Using the crontab -l option, list the current tasks:
nadir@ipower:~$ crontab -l no crontab for nadir

We can clearly see that no task is defined. Well, it is now or never!

First of all, create a task file
nadir@ipower:~$ crontab -e

Now you had to fill out it. The syntax is: m h dom mon dow command
- m forminute between 0 and 59
- h for hour between 0 and 11
- dom for day of month between 1 and 31
- mon for month between 1 and 12
- dow for day of week between 0 and 7, sunday is represented by 0 or 7, monday by 1, etc ...
- command to execute the command.

Now, take an interest in some special characters (metacharacters) :
- *, if one of the m h dom mon dow fields owns the * character, then it indicates evey minute or evey hour or every day or every day of the month or every month or every day of the week, it depends on which field is placed *.
- / permits to specify a repetition.
- - permits to define a range.
- , permits to specify several values.

Some examples:

*/5 * * * * command to execute a command every 5 minutes.

0 22 * * 1-5 command to execute a command every day, monday to friday, at 10 p.m.

17 19 1,15 * * command means the first and the fifteenth day of the month at 19h17 (7.17 p.m.)

23 0-16/2 * * * command means every 2 hours at the twenty-third minute, between midnight and

Friday, September 21, 2007

Unix: The Unix Philosophy

Essentially, UNIX is made up of files. In fact, every aspect of UNIX is looked at as a file. When we write some data to be displayed on screen for example, the data is actually written to a screen file and then a certain device driver in the kernel is activated. This controls a particular device, in our case the screen. And the contents of the screen file are displayed on the screen. Files that relate to hardware are known as "special files".

We have one universal file - unix itself. But this file is broken up into many other smaller file systems. By default, i.e. when we install UNIX, there is one root and two user file systems created. Normally file systems correspond to physical sections of the disk, basically the root file system and many user file systems.

These file systems are again broken up into directories (which are again viewed as files) and files. These directories can further have sub-directories and files giving rise to a hierarchical tree-like structure.

In DOS, we sometimes divide the disk into logical sections like C and D. Each of these logical drives has its own set of directories and files. To move from one drive to another we just need to specify the drive as the DOS prompt and hit enter.

But while we are at one drive we can access a file from another drive. Now both these drives are always available by default. In UNIX there is a slight difference. While the root file system and the two user file systems that are created by default are loaded, access to any other file system is only possible if they are explicitely mounted. Mounting means nothing but loading them into memory. And considering that file systems are viewed by UNIX as files, if a time comes for them to be accessed, they have to be in memory (as like any other file).

For example, the floppy drive. This too is considered by UNIX as a file. And read or write to a floppy drive is first done in a "special file", from which then the contents are transferred to actual floppy. But to be able to access the floppy drive through the file connected to it, the file has to be mounted i.e. in memory.

Wednesday, September 19, 2007

Linux: How to reset forgotten root password

Sometimes, it may happen that you simply forget the root password. And its more frustrating if it is the only account on your system. What to do if this happens? Re-install the OS? No!!!
When one door closes, the other opens. We have another way to login to system.


There are various methods available for resetting a root password. The list includes booting into a single-user mode, booting using boot disk and edit the password file and mounting the drive on another computer and editing the password file.


In this post, I will list a simple yet useful method only. Others require a little more knowledge of OS-related operations and it may prove dangerous if you perform in a wrong way.


Reseting password by booting into single-user mode
This is the easiest and the fastest method to reset passwords. The steps are a little different depending on if you are using GRUB or LILO as a bootmanager.


For LILO
0) Reboot the system. When you see the LILO: prompt (see Fig. below), type in linux single and press 'Enter'. This will log you in as root in single-user mode. If your system requires you to enter your root password to log in, then try linux init=/bin/bash instead.


1) Once the system finishes booting, you will be logged in as root in single-user mode. Use passwd and choose a new password for root.


2) Type reboot to reboot the system and then you can login with the new password you just selected.


If you have a new version of LILO which gives you a menu selection of the various kernels available press Tab to get the LILO: prompt and then proceed as shown above.


For GRUB
0) Reboot the system, and when you are at the selection prompt (See Fig. below), highlight the line for Linux and press 'e'. You may only have 2 seconds to do this, so be quick.

1) This will take you to another screen where you should select the entry that begins with 'kernel' and press 'e' again.

2) Append ' single' to the end of that line (without the quotes). Make sure that there is a space between what's there and 'single'. If your system requires you to enter your root password to log into single-user mode, then append init=/bin/bash after 'single'. Hit 'Enter' to save the changes.

3) Press 'b' to boot into Single User Mode.

4) Once the system finishes booting, you will be logged in as root. Use passwd and choose a new password for root.

5) Type reboot to reboot the system, and you can login with the new password you just selected.


* Disclaimer *
Use the information in this document at your own risk. I completely deny any potential liability for the contents of this document. Use of the concepts, examples, and/or other content of this document is entirely at your own risk.
The information in this document should only be used to recover passwords from machines to which you have legal access. If you use this information to break into other people's systems, then I am not responsible for it and you deserve your fate when you are caught. So don't blame me.
You are strongly advised to make a backup of your system before performing any of the actions listed in this document.

Wednesday, September 5, 2007

Unix/Linux: What is the main advantage of creating links to a file instead of copies of the file?

The main advantage is not really that it saves disk space (though it does that too) but, rather, that a change of permissions on the file is applied to all the link access points. The link will show permissions of lrwxrwxrwx but that is for the link itself and not the access to the file to which the link points. Thus, if you want to change the permissions for a command, such as 'su', you only have to do it on the original. With copies you have to find all of the copies and change permission on each of the copies.